To create a dynamic live streaming video that people want to watch, you need to take advantage of every resource you can. In this blog post, we will show how you can live stream with multiple video sources using ManyCam to create an impactful live video. Here you’ll learn how to use the new Picture-in-Picture feature, as well as managing presets and scenes to give your videos a professional look.
What are video sources and why does it matter?
When you’re creating a live video, you’ll need to have at least one video source, like your Webcam. But, with ManyCam, you can get creative. There are many possibilities when it comes to different video sources you can add, which can help you create the video you envision. Here are some of the options you can find there:
- Webcam
- Game Capture (Windows)
- IP Camera
- ManyCam Mobile
- Media File
- Youtube URL
- Desktop
- Blank Image
- Web source URL
Many of these options also have other possibilities within the main menu. For instance, within the desktop option, which allows you to share your screen, you can choose whether you want to share your entire screen and designated sections or apps. Also, the media file can be images and videos, which gives you a lot of freedom when producing your live stream.
Live video is all about getting your audience engaged, and these video sources can help you achieve that. Using images, pre-recorded videos and other sources can be the key to delivering high-quality content.
Importance of Picture-in-Picture
The Picture-in-picture feature allows you to add multiple windows on top of your main screen. To keep your audience engaged, even when you’re not on the main screen, you can put your webcam view in the smaller window. It helps your audience focus on your content when they can maintain the visual contact with you.
Since you can add many windows, this feature can also be used in creative ways. For example, you can add different images to each of them that you want your viewers to see. It can come in particularly handy if you’re an online teacher and need to keep your students engaged while explaining concepts.
How to Live Stream with Multiple Video Sources
On ManyCam, depending on your current plan (free, standard, studio or enterprise), you’ll be able to add a certain amount of video sources. The free version gives you two video sources, so if you don’t have ManyCam yet, make sure you download it here.
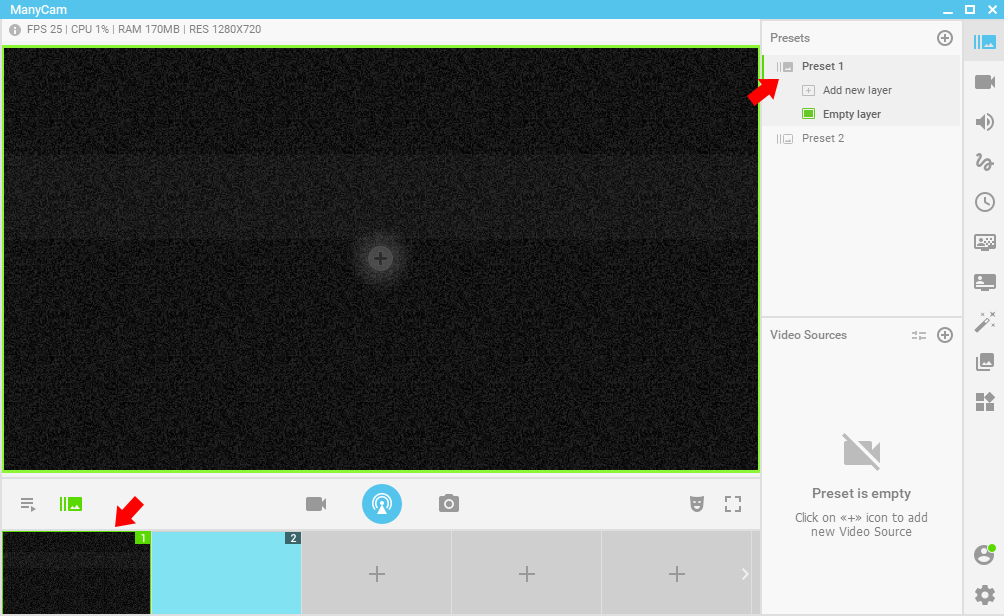
At the bottom of the user interface, there are the scenes or sources you can add. If you right-click on them, you can add any new source you’d like. Here is a video to help you familiarize yourself with the interface.
One of the best additions to the latest version of ManyCam is within the Presets tab. Each preset represents one of your video sources, and within the preset, you can rearrange the order of all your elements.
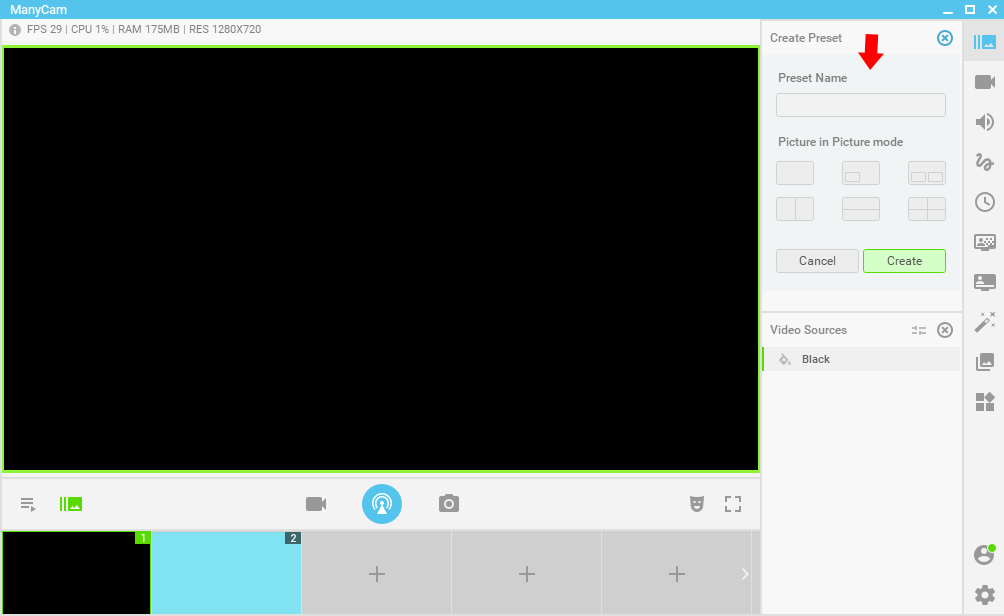
If you add a new preset, you get a few options to choose from:
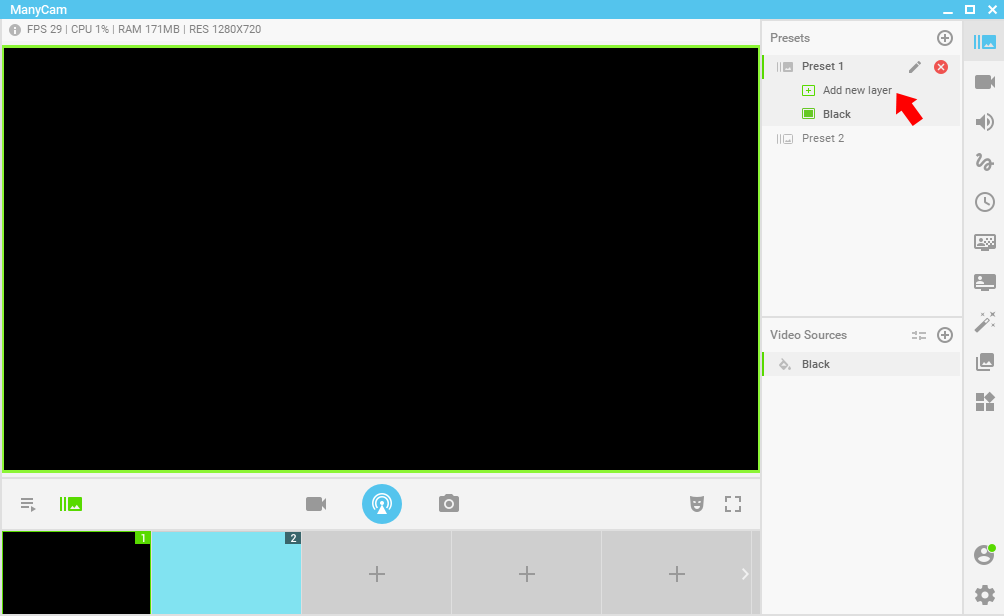
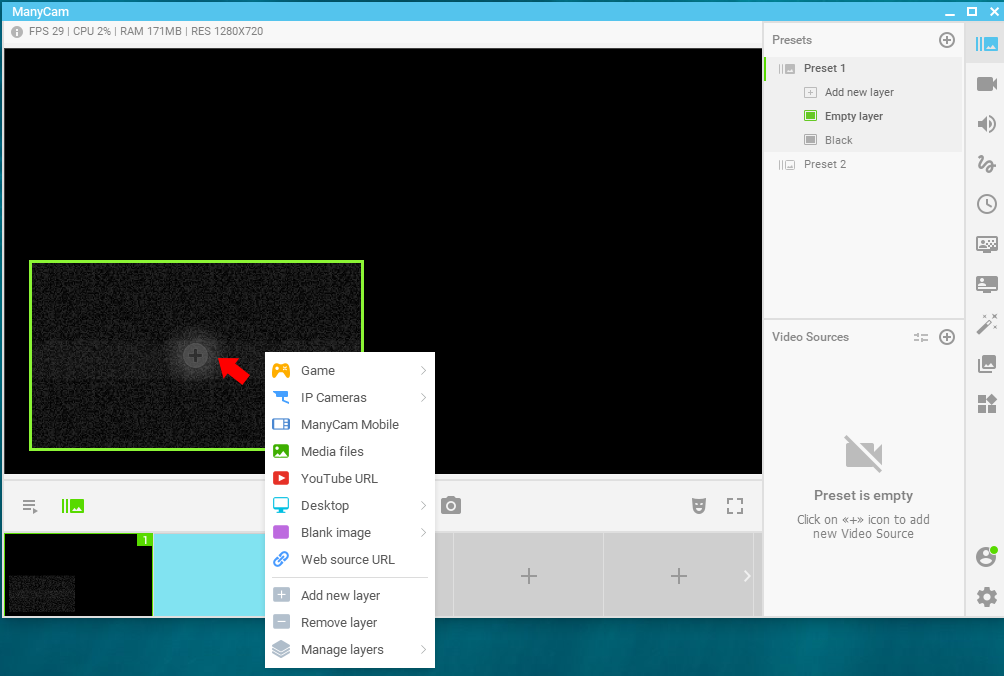
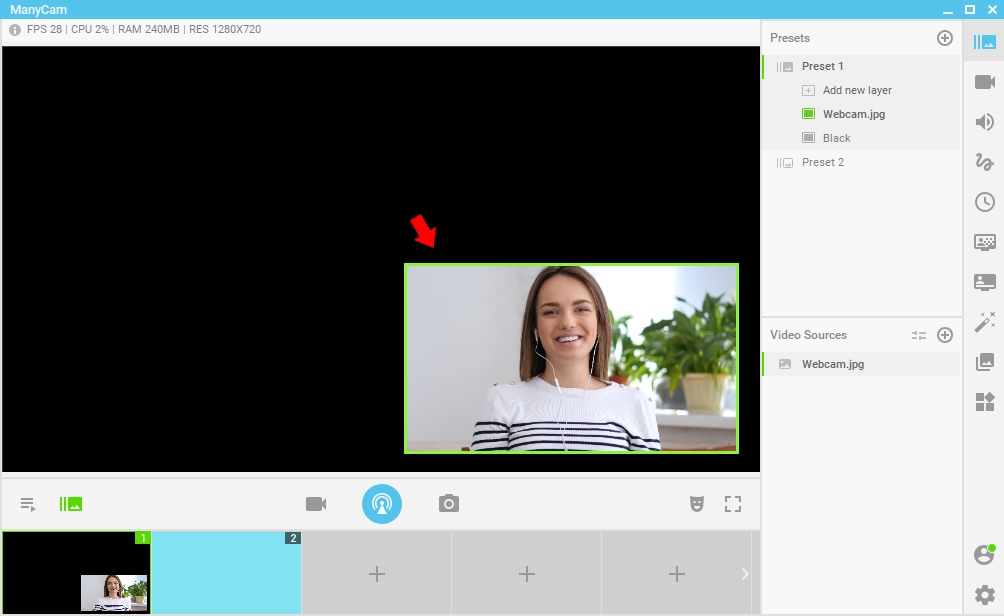
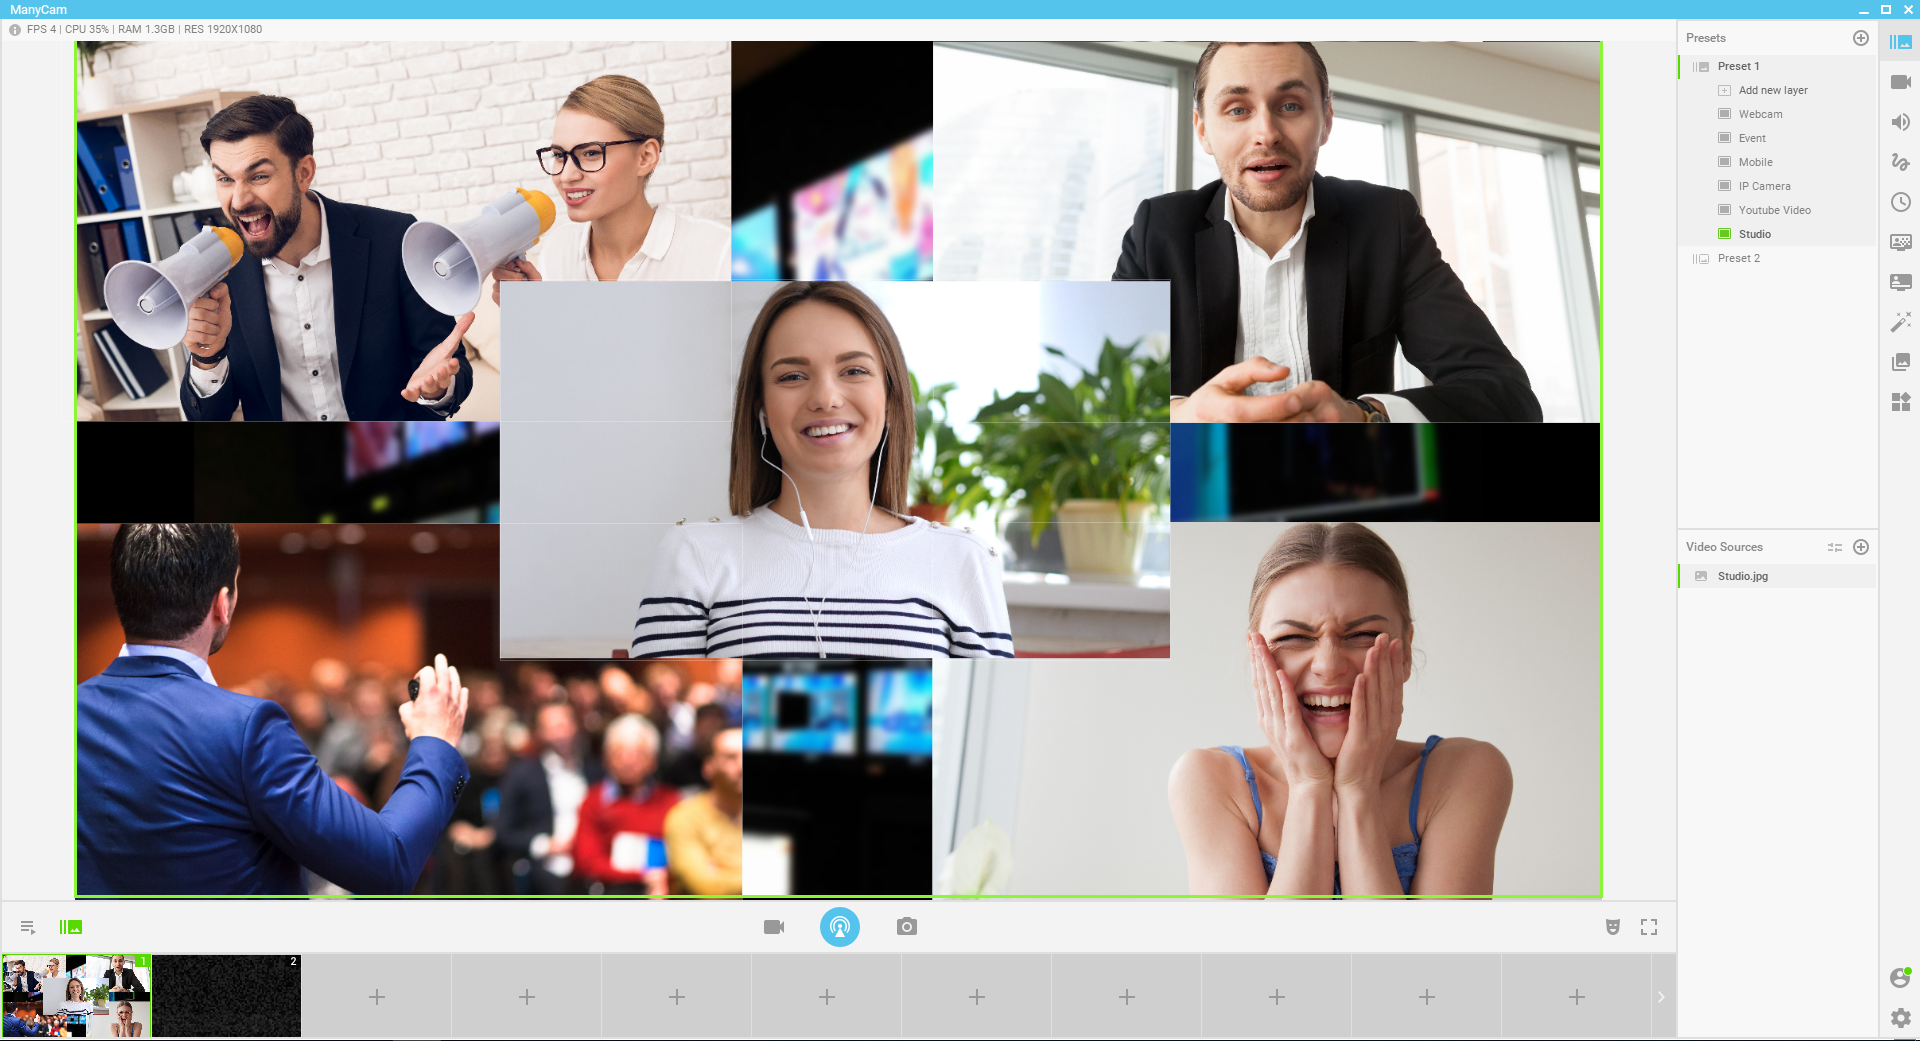
For instance, if you can on “Add new layer,” you’ll add a window on top of your main screen. You can drag and drop that window anywhere you want, and you can resize it. If you can on it you’ll be able to choose between the video sources options and add whatever you need. Here, we’ve added an image.
Added the source and dragged to the position we wanted.
To rearrange the order of the items within your Presets panel, you can click and drag the layer to the position you want. You can also delete any layer at any time and edit the preset.
Managing Video Sources
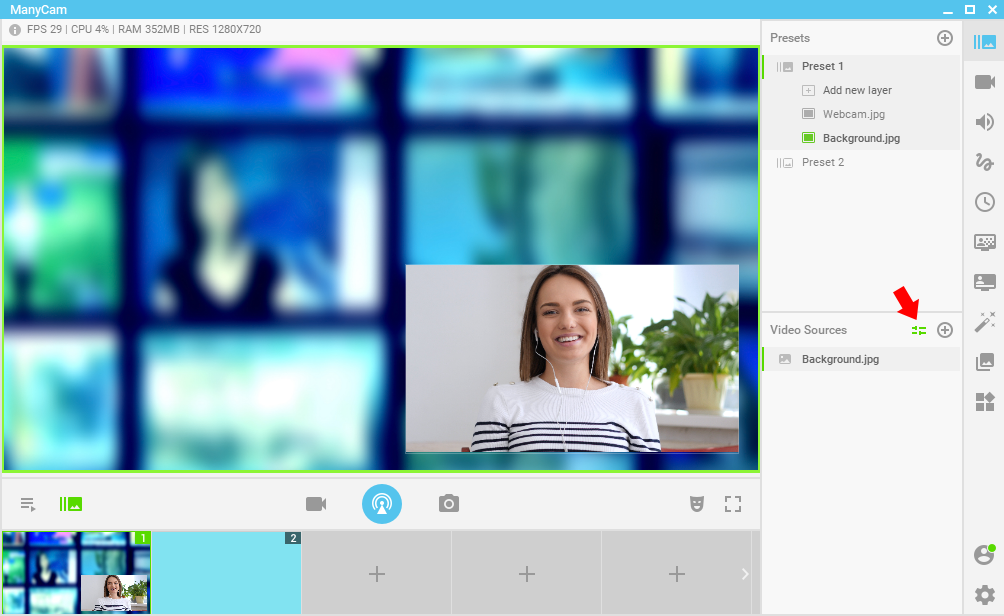
For each element you add on the Presets Panel, you can tweak it even further within the panel below: Video Sources. Inside one element, you can add other video sources and transition between them. Once we click on it, we can see it in the bottom panel too.
In the video sources panel, we can add other video sources and create transitions between them. You can also choose which transition you want and its speed.
The great thing about this is that you can prepare everything before you live stream. So, while you live stream, you can transition between your scenes with the click of a button using the panel at the bottom.
Summary
On ManyCam, you can add and manage all your video sources within the Presets tab. It’s super easy to add new layers and rearrange them in the order you want. If you choose to add a Picture-in-picture, you can resize and position it wherever you want on the main screen.
You can also right-click directly on the window you want to add something. Choose your sources, select videos, images, webcam or anything else and add them. Doing a live stream with multiple video sources is easier than ever.
When you live stream with multiple video sources, you’ll be able to keep your audience engaged and focused on your content. It’s a great way to set yourself apart from all the other live videos out there. Make sure you download the latest version of ManyCam so that you can take full advantage of the features. (LINK)
Share with us your live streams with ManyCam in the comment section below.
Here are other blog posts to help you grow your audience:
The Ultimate Guide to Smart Video Collaborations
Video collabs can fast-track your online growth when you find the right partners. When you create smart video collaborations on YouTube or any other platform, you get access to an entirely new potential audience in an organic and positive way... (Continue reading)
Live Streaming Setup 101 – Everything You Need to Know
Live Streaming doesn’t have to be as complicated as some set it out to be. Although to have an impact, they can’t be simplistic. What we mean by that is, it’s essential to have a thought process and a structure to your live streams. Even if you are sharing a spontaneous live video with your audience, you need a certain level of quality content and equipment. (Continue reading)

