How to create your own Eyes Accessories effect using Adobe Photoshop software
First Download the Face Accessories stencil from the ManyCam website.
The stencil picture looks like the picture below and its size is 320x320 pixels:
- Open the stencil picture with Adobe Photoshop.
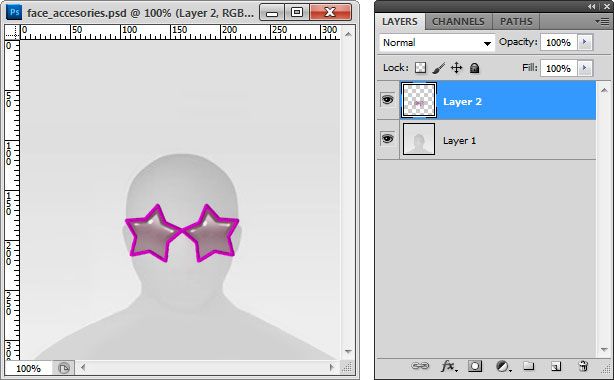
- Open the Photoshop Layers Window: select Main Menu - Window - Layers item. Press the rectangle button to create a new layer.
- Draw the picture that will become your new face accessory in the new layer you have created (use Adobe Photoshop drawing tools: Pencil, Brush etc). You can also copy a picture from any other file and paste it to Layer2. When pasting a picture from a file keep in mind that not every format supports transparency (only PNG and GIF). If there are unnecessary details on the picture (a non-transparent background for example) you can erase them with the Photoshop Eraser Tool. In this example we paste an eyeglasses picture from a .png file.
-
Use the Move Tool to position the effect picture so that it overlaps the face template correctly, just like you'd want it to overlap your face in the ManyCam video window.
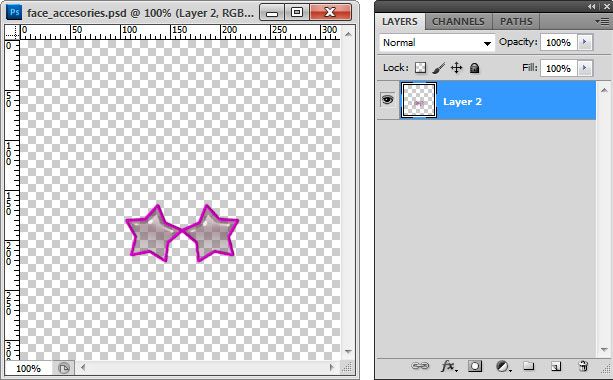
- Next delete the original layer with the ManyCam face template: select the original Layer1 and press the trash button.
-
Now you have only one layer - Layer2 with your effect picture on a transparent background.
-
Save the picture in PNG format to keep background transparency. Select Main Menu - File - Save as item. Select PNG format, type a file name (eg. my_glasses.png )and press the Save button. Check any PNG Interlace Options and press the Ok button. Now you can add the effect you have created. It will look like this: