How to use Virtual Backgrounds
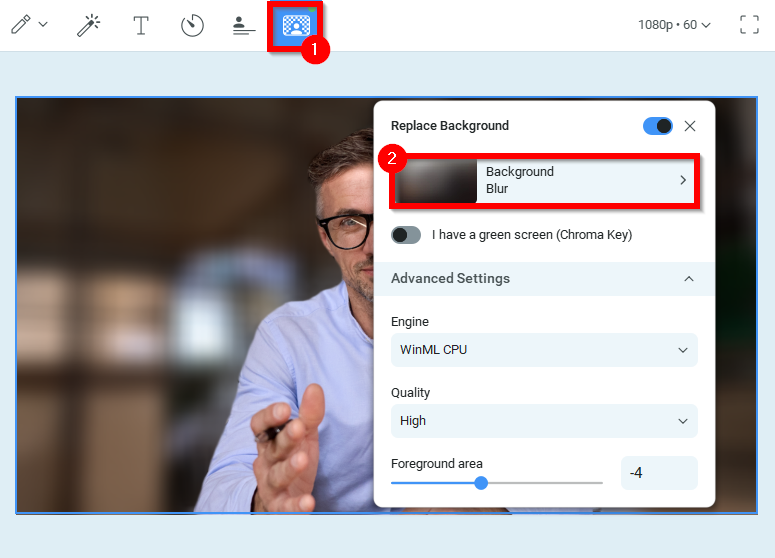
First, click the Virtual Backgrounds icon as shown below.

Then click on the Background blur tab to open the settings:
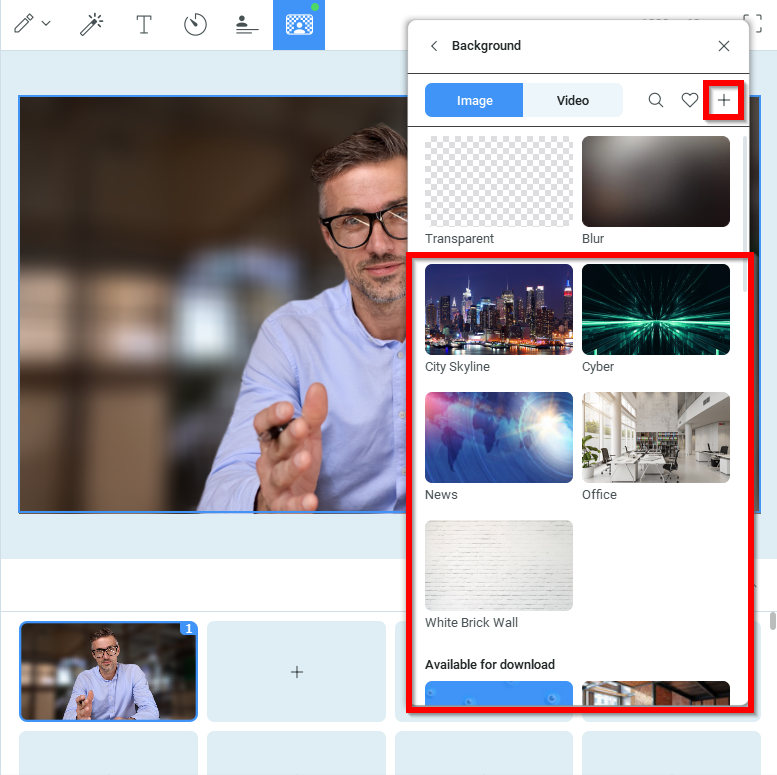
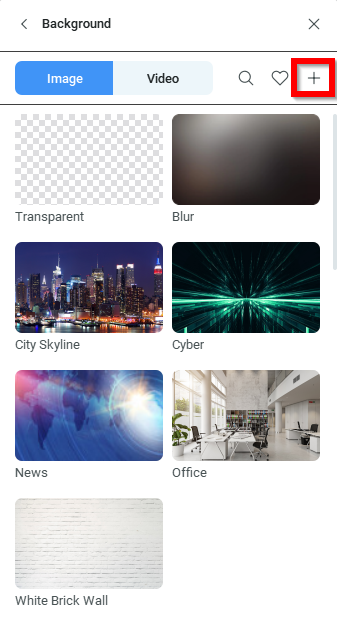
Here you can select Transparent background, Blur, an image or a video file from the ManyCam collection, or any custom image or video of your choice.
Background blur
This feature allows you to blur your background environment leaving the focus on the person in the frame.
Requirements
To run Background blur, make sure you met the following requirements:
macOS
- Metal hardware acceleration mode enabled. Navigate to ManyCam Settings -> General and select Metal from the list of Hardware Acceleration modes.
- Make sure you run macOS High Sierra (10.13.4) or newer,
- Make sure your hardware (GPU) is MPS-compatible. Such hardware includes macOS GPU family 1 or higher. For more information on Mac support for Metal, see Mac computers that support Metal.
Windows
- Windows 10 build 2004 or higher
- GeForce 500 series or higher
- or AMD Radeon 7000 or higher (HD 7730 and up)
- or 6th generation Intel Core Processor or higher (discrete GPU is preferable)
- DirectX 12-compatible GPU (feature level 11_0 or higher)
- WDDM 2.0 or higher
- Shader model 5.1 or higher
- ARM64-based systems are not supported (Surface Pro X)
To enable Background blur, click on the Virtual Backgrounds icon, and make sure Background blur is selected as shown below.
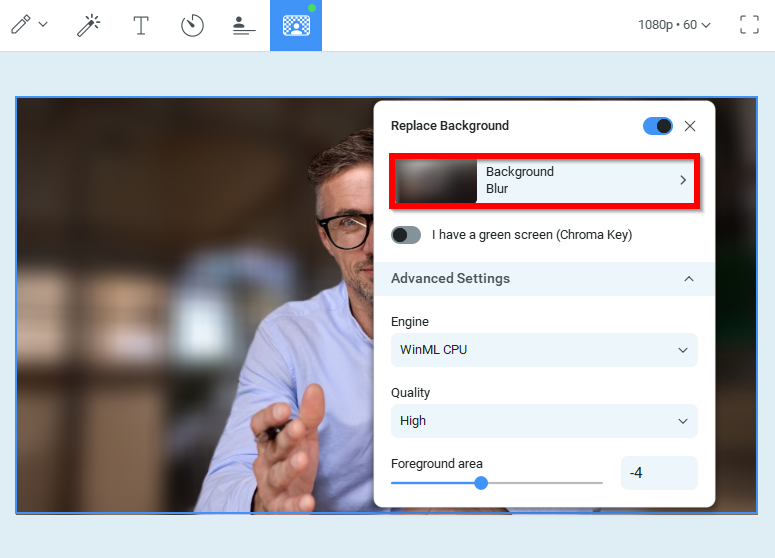
Replace background (without a green screen)
This feature allows you to replace your background without a physical green screen. You can pick any default ManyCam background or add your own custom image.
To enable Background replacement, click on the Virtual Backgrounds icon, then click on the tab as shown below.
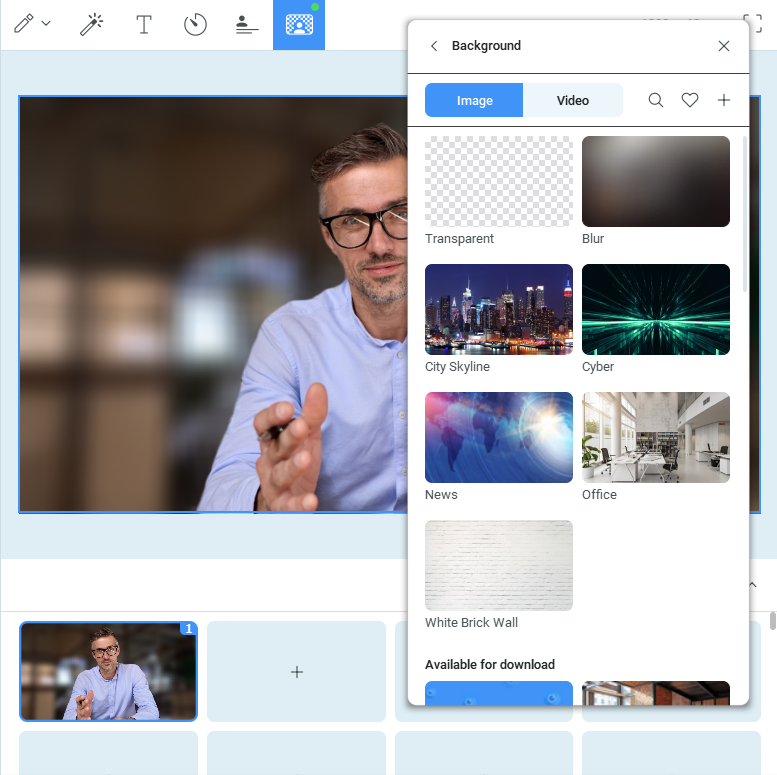
Then select an image for your background from the ManyCam collection, or pick a custom image from your computer:
Replace background with Chroma key (green screen required)
What is Chroma key
Chroma key compositing is a special effects technique for compositing (layering) two images or video streams together based on color hues (Chroma range). The technique has been used heavily in many fields to remove a background from the subject of a photo or video – particularly in newscasting, motion picture, and videogame industries.
The ManyCam Chroma key feature allows you to remove your real background from the video stream and replace it with an image, video, or any other supported ManyCam video source.
How to enable Chroma key
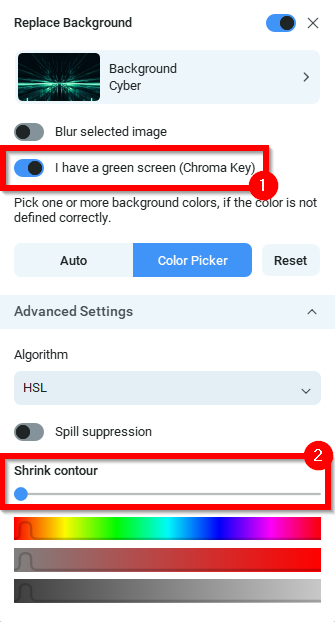
Click on the Virtual Backgrounds icon, and enable the ‘I have a green screen’ setting as shown below.
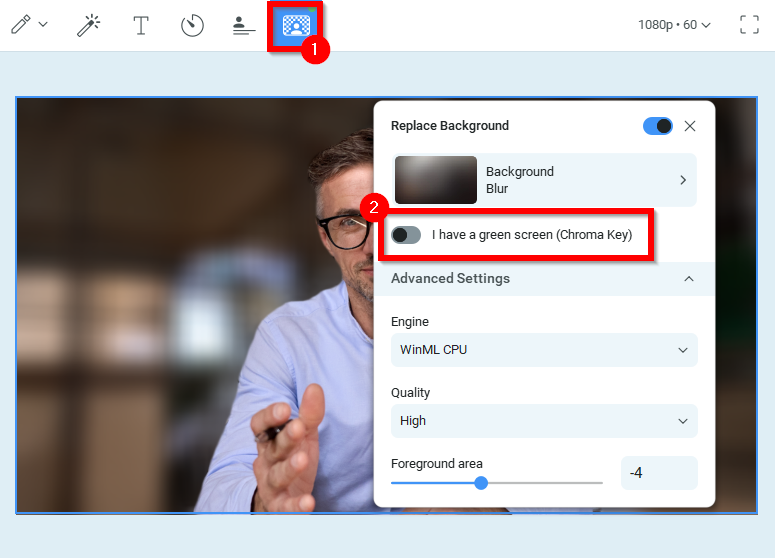
You can choose between two modes: Color Picker and Auto, either of which may produce different outcomes depending on your environment, webcam parameters and settings, ManyCam video settings, and Advanced Chroma key settings selected.
To select background image or video, click on the Background setting.
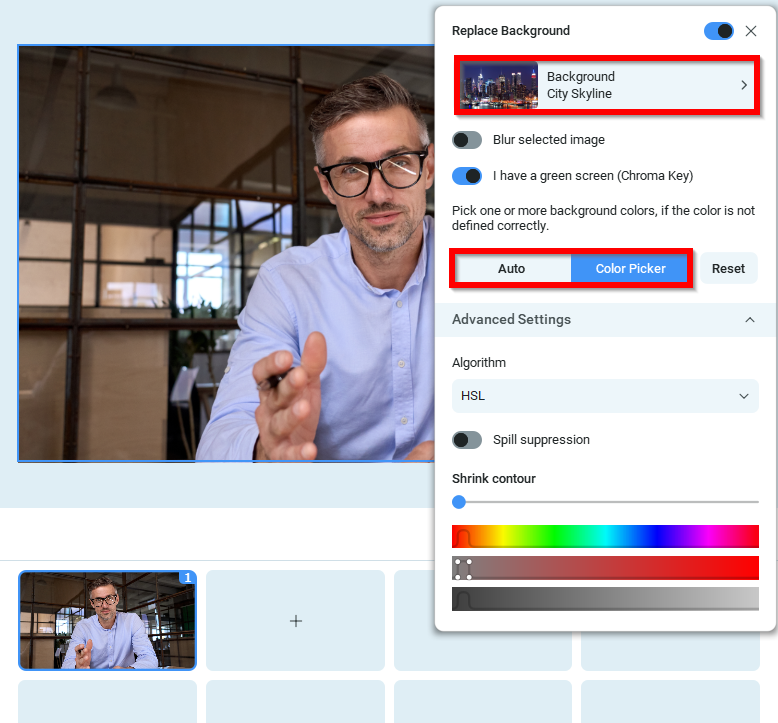
Remove background using Color Picker (green screen required)
Color Picker allows you to manually select the colors that need to be replaced with a background.
Using the color picker control, choose the color you want to remove from your video stream. The best results can be achieved if you have a green background (or any other color that differs from your clothes, otherwise they will be removed from the video as well). ManyCam offers two algorithms that both work with Color Picker and may produce different outcomes depending on the setup and environment.
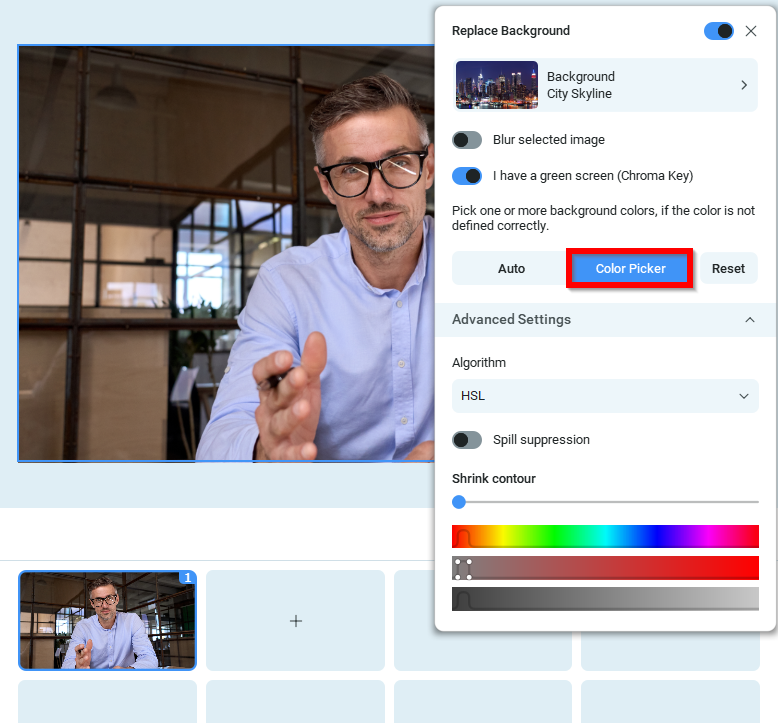
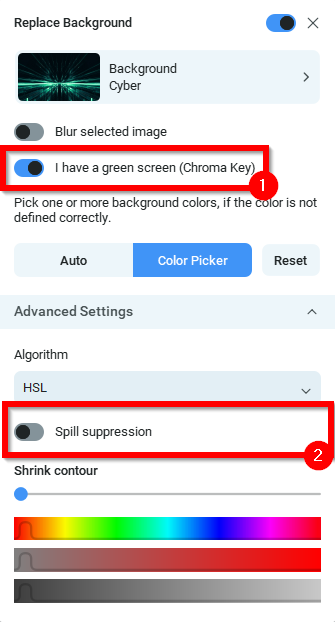
Using the HSL algorithm:
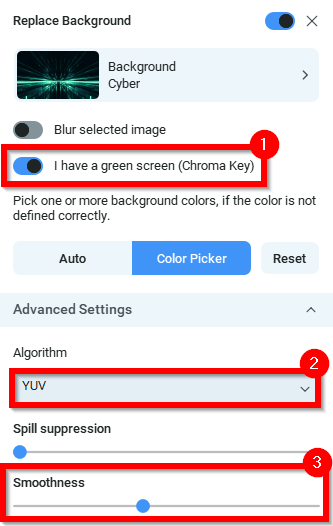
Using the YUV algorithm:
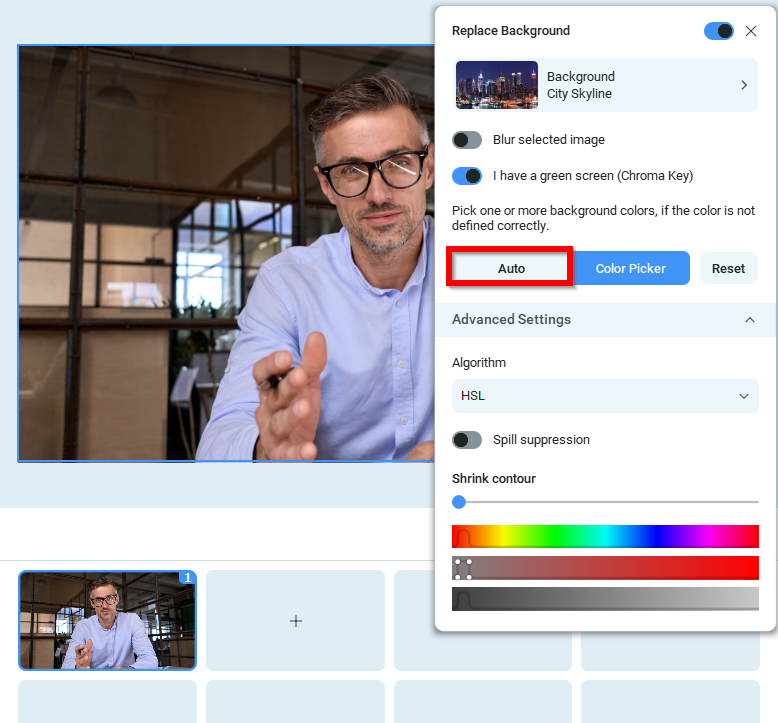
Remove background automatically (without Color Picker, green screen required)
In the Auto mode, ManyCam automatically selects the colors to be replaced with the background, meaning you don’t have to do it manually. The result may vary, so it’s advised to adjust the Advanced Settings too in order to achieve the best outcome.
Selecting a custom background media
You can choose one of the predefined images or videos as your background, upload your own custom image or video, or go with a transparent background.
About the Chroma key algorithms
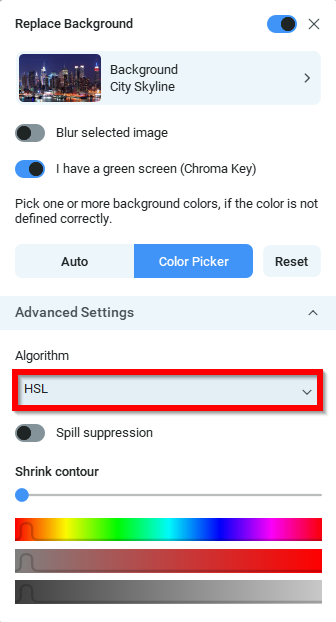
HSL
HSL is an algorithm that allows you to adjust the hue, saturation and luminosity filtration. With HSL you can improve the quality by manually adjusting the Hue/Sat/Lum color components.
To select HSL, first enable the Advanced settings as shown below. If you selected the Color picker mode, proceed with keying out the unwanted colors with your mouse cursor.
YUV
Compared to HSL, the YUV algorithm works with solid-color backgrounds only, which are red, green and blue, therefore the result it produces may differ greatly from that of the HSL. Compared to HSL, YUV works better with the Auto mode, however, HSL offers a different color range to key out when used with color picker. Try both algorithms to determine which works best for you.
Fine-tuning the result
Use the settings listed below in order to eliminate color removal errors.
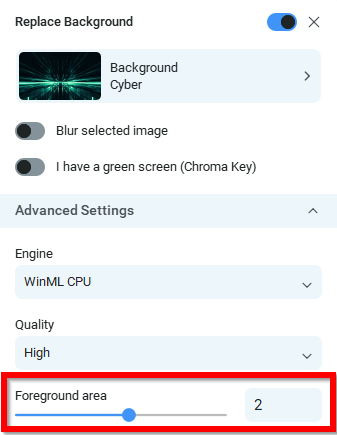
Foreground area
The Foreground area setting allows feathering the bodyline edges to eliminate any artifacts, pixelation or ruggedness.
Shrink contour
The Shrink contour function is responsible for reducing the object’s contour. To access this setting, enable Advanced settings, and select HSL.
Spill suppression
Color spills happen when light reflects from a shiny object that is present inside or maybe even outside the frame. During chroma keying, color spilling mostly occurs from the chroma key green screen backdrops. Spilled color casts a noticeable shadow on the subject, especially around the hair, shoulders, and bodyline.
The Spill suppression setting removes any color spill from the backdrop and ensures accurate color in the final image. To access this setting, enable Advanced settings.
Smoothness
Smoothness adds another area to the image and then makes this area semi-transparent. Use this setting to eliminate artifacts along the edges of an object. This setting is also great for transparent objects made of glass or plastic.
To access this setting, enable Advanced settings, and select YUV.
Troubleshooting
Please refer to this guide if you experience any technical issues related to Virtual Backgrounds.